
All About Anemone
The best things come in small packages!
Who would have guessed that this little lump of a corm could be such a star? Anemone is one of the best bang for the buck things to plant in any garden. Each corm can be planted in Spring or Fall, can produce up to 20 blooms per plant, and are winter hardy zones 8-10. Anemone are great companions to tulips, daffodils and ranunculus.
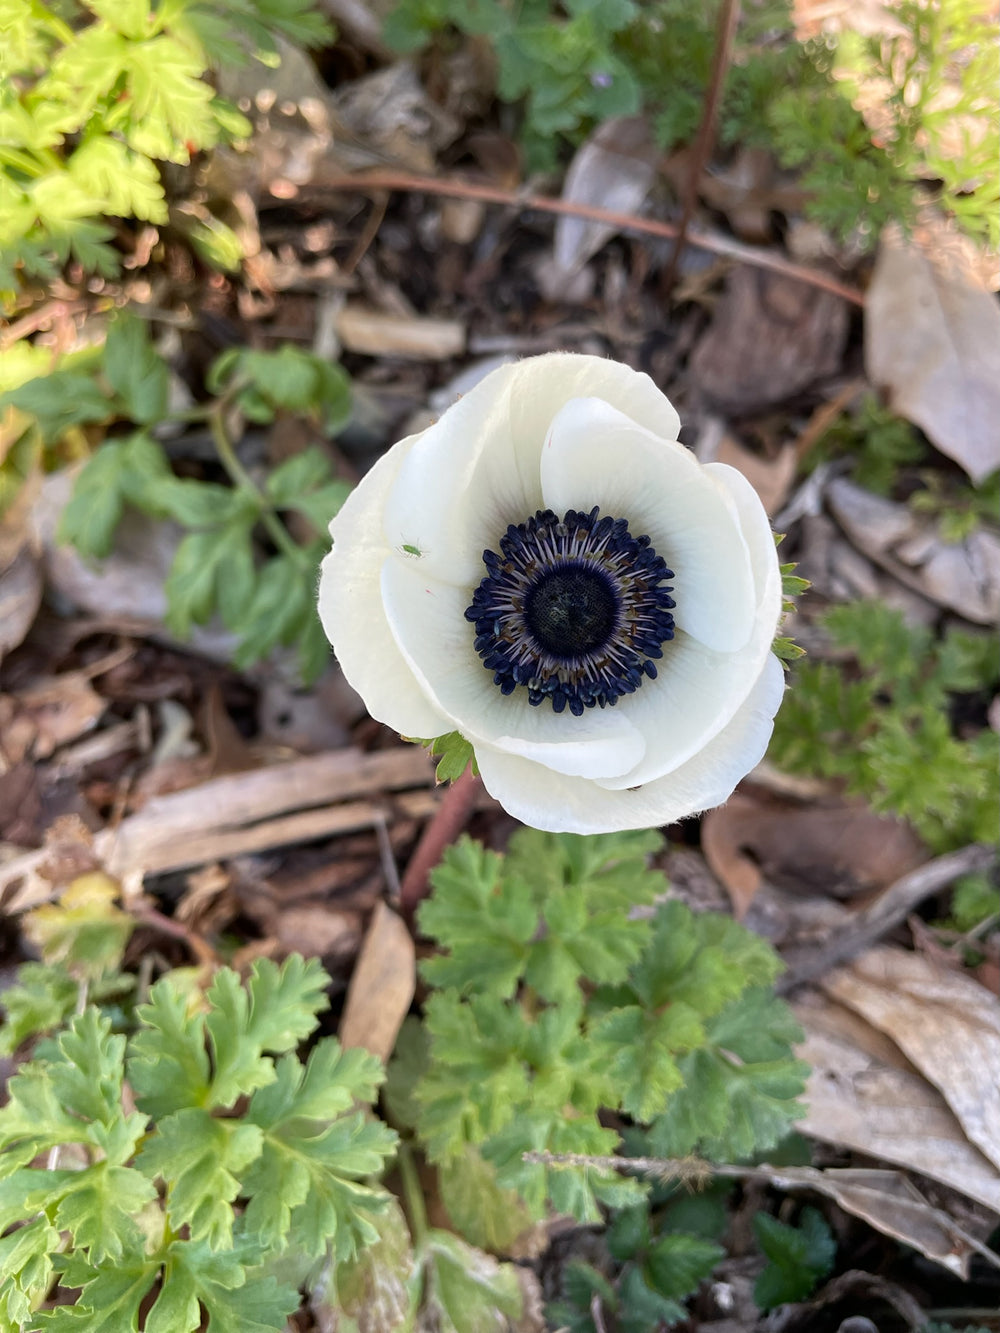
Anemone Coronaria (AKA Poppy Anemone) cut flowers are beloved for their stunning colors and unique petal structure, making them a popular choice for floral arrangements and bouquets.
Whether you're an experienced gardener or a beginner looking to try your hand at cultivating these beautiful blooms, this guide will provide you with valuable tips and insights on successfully growing anemone cut flowers.
Choosing the Best Varieties
Don't get us wrong, Anemones found in garden centers are great… BUT they tend to have short stems and smaller blooms. We’ve found our favorites with the longest stems, unique colors, and huge blooms to share with you.
Each type has something special.
Corm Size indicates maturity and size of Plant: 5-6 cm is the largest and most resilient to plant, 4-5 cm is best for pro growers to maximize blooming, 3-4 cm flower later but will continue to bloom longer.
The varieties we grow are:
Carmel
Bold, strong colors, HUGE blooms, strong thick stems, 16” stem, best in full sun.

Galilee
High bud count, large flowers, 18-24” stems. Early bloomers, many blooms per plant, medium flowers, do well in cooler temperature, part shade tolerant.

Marianne
French variety, 16” stems, 10-20 blooms per corm, large flowers.

Mistral
Italian Ranunculus variety with large blooms, very strong stems, the most unique colors.

Let's get growing!
When should i Plant?
Anemone like cool temperatures. They will shut down once soil temperature are above 75°F.
In zones 8-10 you can safely plant corms in fall and they will grow all winter for a very early spring bloom.
If you are in zone 7 and cooler, save your corms for a winter pre-sprout and transplant outside when temperatures warm to above 37°F.
In zone 7, Northern Virginia we plant in both spring and fall. Our Fall plantings go in the sunniest warmest parts of the garden.
We keep a careful eye on the weather and cover the baby plants with frost cloth if temperatures dip below 27°F.
Spring Plantings are pre-sprouted indoors in January-March and Transplanted Feb-April 1.
Prep is key!
Storage:
When you get your Corms store in a dry, 65-70 degree area, out of direct light.
Be sure to keep in a ventilated bag, not plastic.
HHF Tip: Corms can be stored for up to a year in good conditions.
Soaking Corms:
Soaking corms gives plants a major head start!
Soak Corms in cool (60°F) water with a slow drip or an aquarium bubbler to aerate water for 24-36 hours.
HHF Tip: Rinse and dip for 30 minutes in Root Shield WP or Actinovate, mixed according to directions for soak. Corm will triple in size and look plump. Corms can be planted outdoors at this time or pre-sprouted
What is pre-Sprouting?
Pre-sprouting gives the corm or bulb a chance to start sprouting roots in a controlled environment before planting outside or in a larger container - AKA you will get blooms earlier!
Corms sprout best in 55° temperature soil. Cooler temperatures will slow sprouting, while warmer temps lead to rot.
There are lots of methods for pre-sprouting, and we've tried most of them.
This what works for us:
- Soak corms for a 24hrs and place Corms (point down) into large cell trays, half filled with damp 50/50 perlite and coco Coir, covered with 1” of P&C mix.
- Cover tray with a vented humidity dome (we keep these in a dark, 65° basement for 2-6 weeks)
- After one week pull one corm out and you’ll see a little green/cream node on the top of corm.
-
Only water tray if dirt is completely dry and cracking.
We rarely need to water sprouts until green begins to show.
-
Transplant to larger containers once root system has developed or a green shoot shows on top.
For our spring planting here in Arlington, VA, we soak and sprout beginning in January and transplant sprouted corms February-March when soil temperatures are 40-55°F.
For Fall Planting we transplant sprouted corms directly in the ground.
Now we're ready for soil!
1. Prep & Planting
Prep:
Anemones thrive in well-draining soil, so ensure proper soil preparation.
- Loosen the soil to a depth of about 8-10 inches, removing any weeds or debris.
- Add organic matter, such as compost, to improve drainage and provide nutrients for healthy growth.
Planting:
Anemone corms are the bulb-like structures from which the plants grow.
- Plant the corms in the desired location during the recommended time, usually in the fall for spring blooms.
- Place them about 2-3 inches deep with the pointed side facing downwards.
- Provide sufficient spacing between the corms to allow for growth and airflow.

2. Watch them grow!
Sunlight and Watering:
Anemones prefer full sun to partial shade for optimal growth and abundant blooms.
- Ensure they receive at least 6 hours of direct sunlight daily.
- Water the plants consistently, keeping the soil slightly moist but not overly saturated.
- Monitor the moisture levels and adjust watering as necessary, especially during dry periods.
Fertilization and Maintenance:
Apply a balanced fertilizer at planting time and periodically throughout the growing season.
Avoid excessive nitrogen, as it may result in more foliage than flowers.
Regularly inspect the plants for pests or diseases and take appropriate measures to control them.
Deadhead spent flowers to encourage continuous blooming and remove any yellowing or damaged foliage.

3. They're Blooming!
Staking and Support:
Anemones can have tall, slender stems that may require support to prevent bending or breakage. Full disclosure - we do not stake or net anything. Things can get wriggly.
If you want straight stems use stakes or install small cages around the plants early on to provide support and maintain their upright growth.
Harvesting Anemone Cut Flowers:
When the anemone blooms are fully open, it's time to harvest them for cut flowers.
Cut the stems at an angle just above a leaf node and immediately place them in a bucket of clean water.
Harvest the flowers in the morning or evening when temperatures are cooler to prolong their vase life.
- Be sure to take a picture of your gorgeous blooms!
4. Make the most of your cut flowers
When to cut? Let flower open 1st day, let flower close that evening, cut flower the second day after sunrise and place in cool water.
Flowers get larger after cutting and stems can stretch.
To maximize the longevity of anemone cut flowers, remove any foliage that would be submerged in water.
Change the water every two days, adding floral preservatives to extend their freshness.

HHF Tip: Soil Temp note-buy a soil thermometer! A good guide of soil temp is the average of the day and evening temperature
Follow these guidelines and soon you'll be as hooked on anemones as we are.
Follow us on IG for seasonal planting tips
CHEERS!
HHF
Leave a comment